Using I2C OLED Display#
Using I2C on BeagleY-AI is similar to using it on any Raspberry Pi compatible board. The image below shows the BeagleY-AI I2C pinout. For more information check pinout.beagley.ai/pinout/i2c.
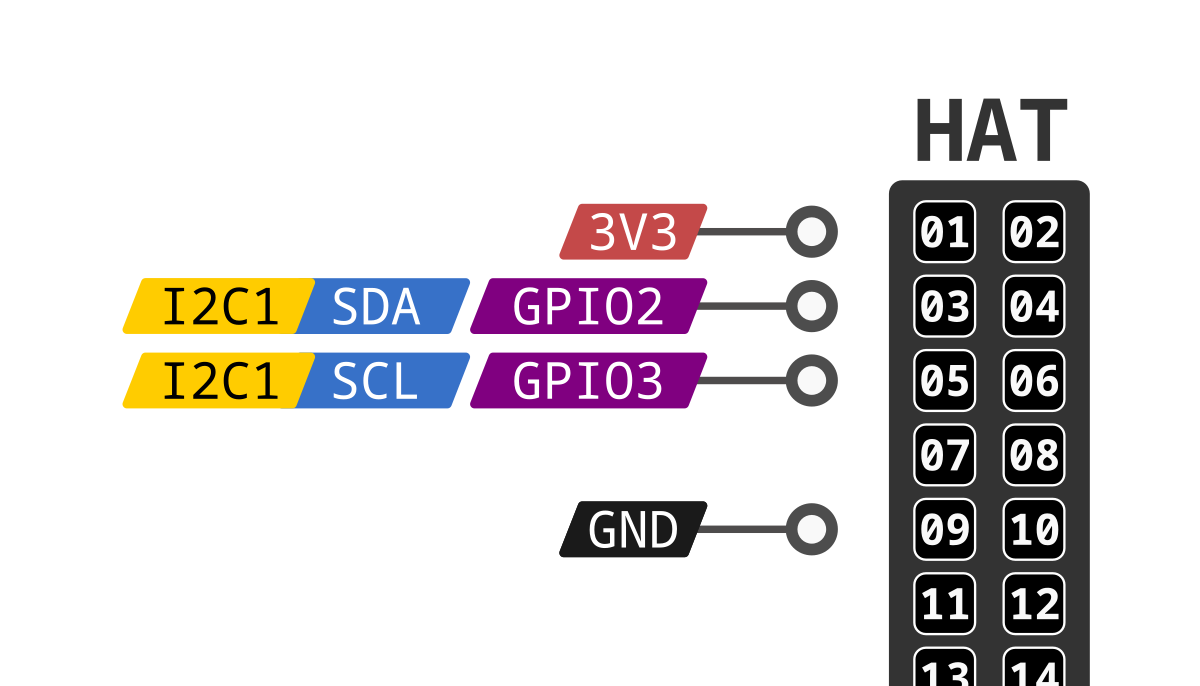
Fig. 125 BeagleY-AI I2C pinout#
OLED (ssd1306) displays#
Wiring/connection#
Following the I2C pinout shown above let’s make the connection of our OLED display with BeagleY-AI.
Connection for both 128x64 and 128x32 resolution displays are demostrated in the images below:
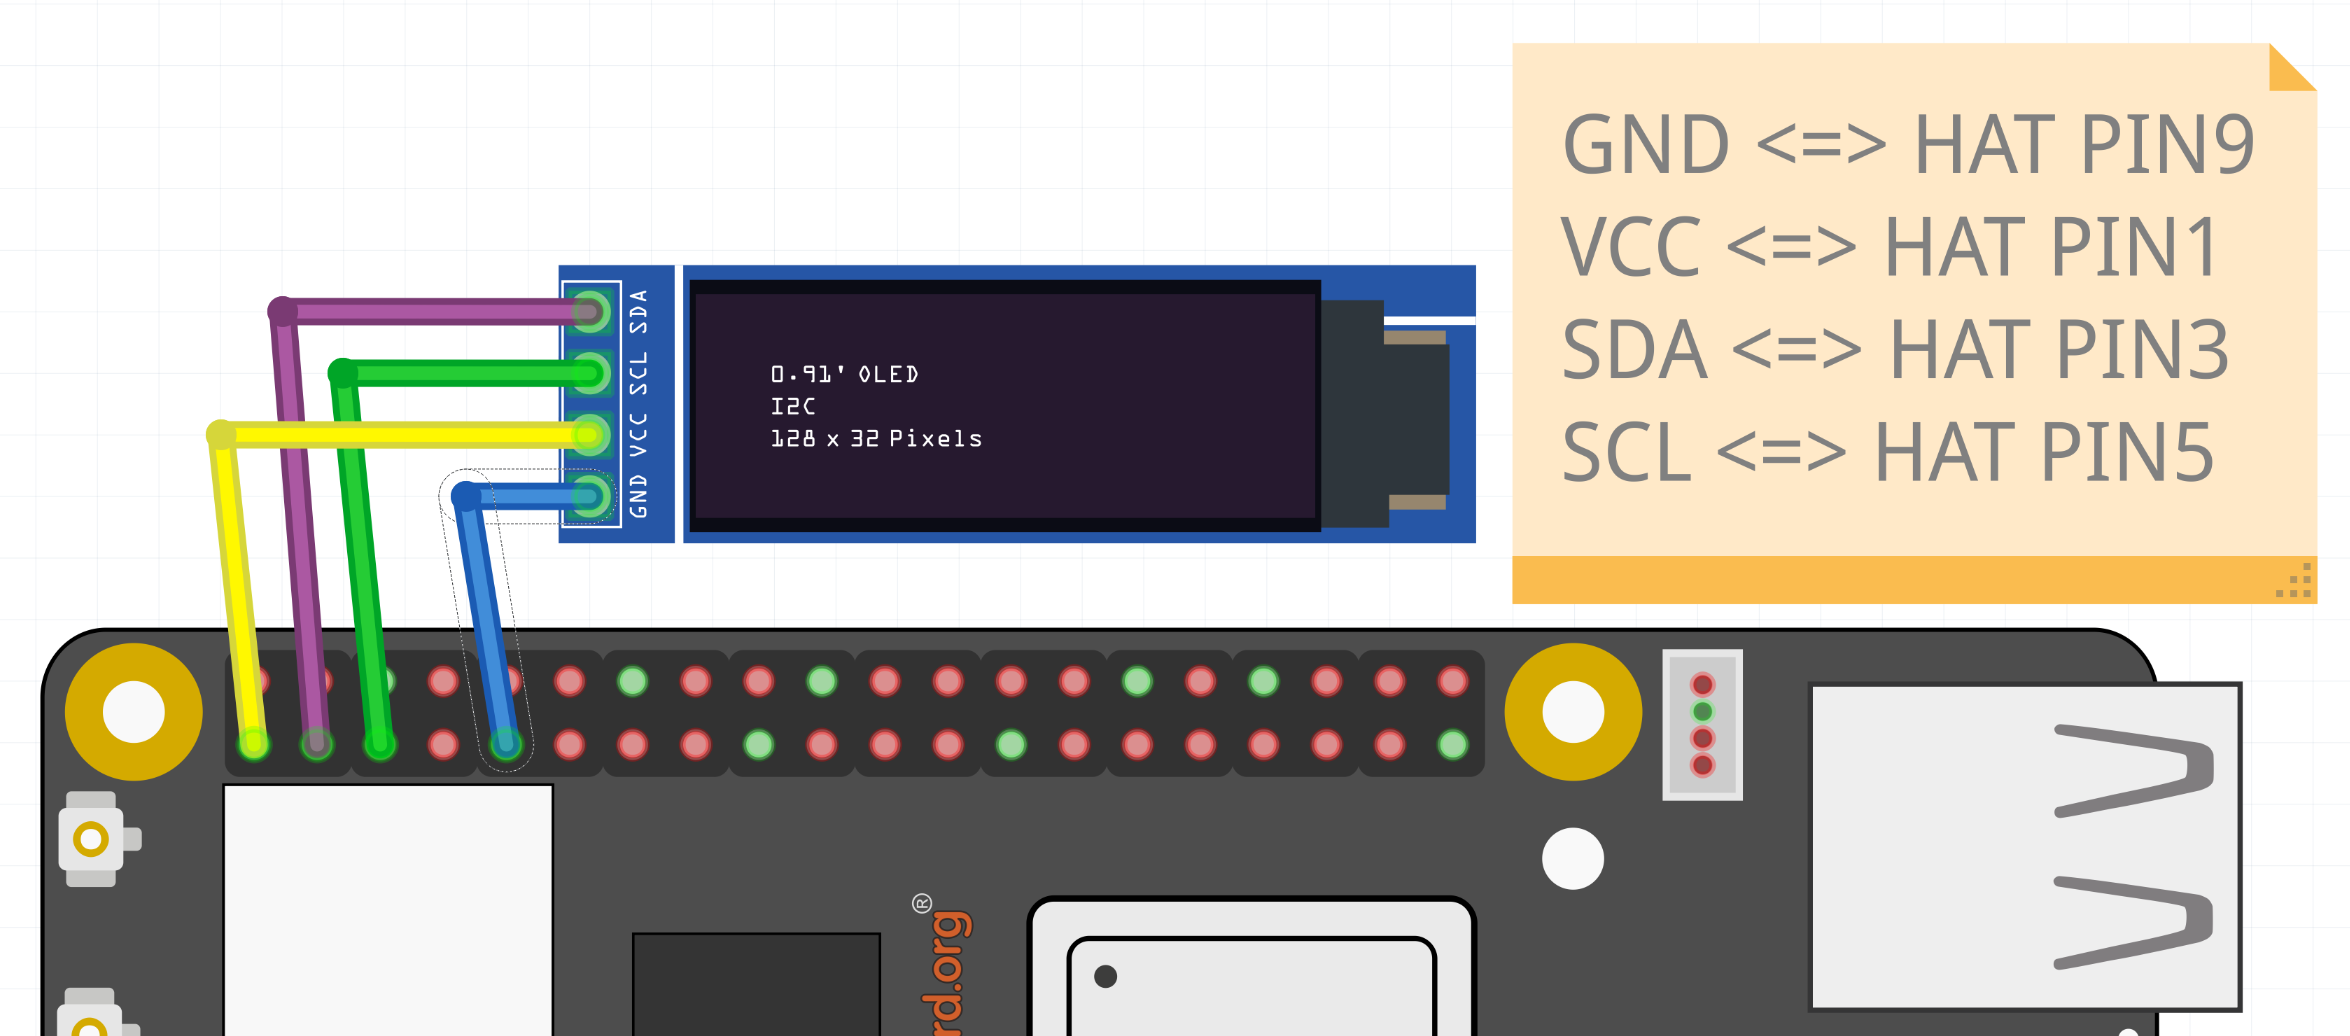
Fig. 126 OLED diaplay 128x32#
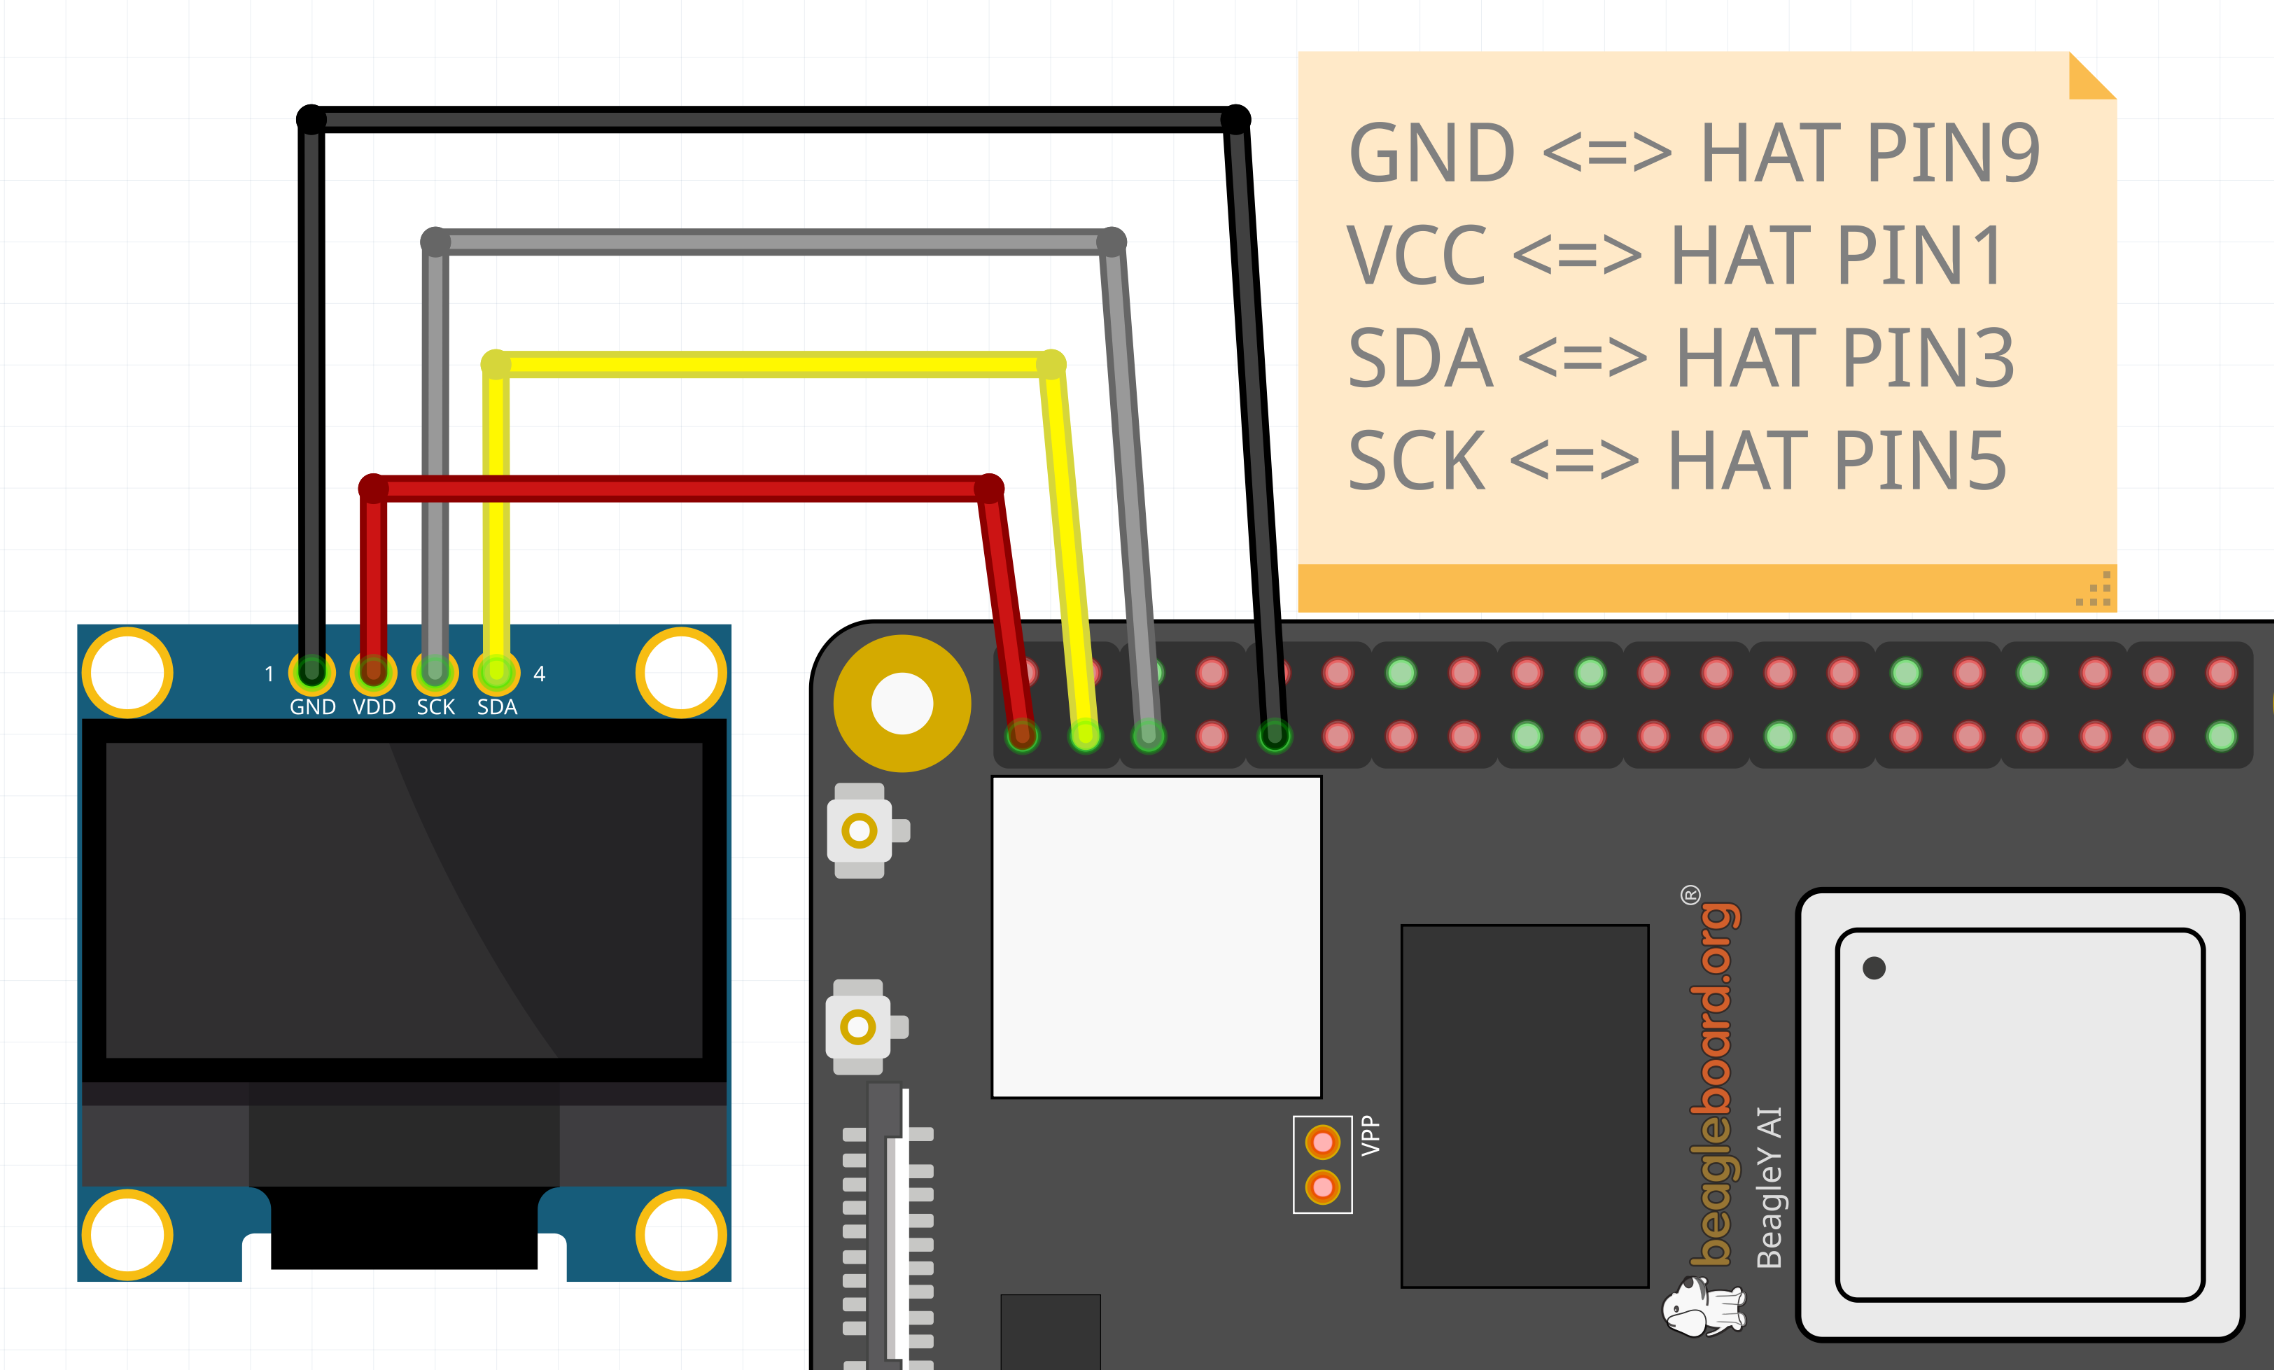
Fig. 127 OLED diaplay 128x64#
To check if your OLED is correctly connected to your BeagleY-AI you
can use i2cdetect command as shown below.
i2cdetect -y -r 1
The above command should show 3c address occupied in the output, which is the default I2C address of our OLED display.
debian@BeagleBone:~$ i2cdetect -y -r 1
    0  1  2  3  4  5  6  7  8  9  a  b  c  d  e  f
00:                         -- -- -- -- -- -- -- --
10: -- -- -- -- -- -- -- -- -- -- -- -- -- -- -- --
20: -- -- -- -- -- -- -- -- -- -- -- -- -- -- -- --
30: -- -- -- -- -- -- -- -- -- -- -- -- 3c -- -- --
40: -- -- -- -- -- -- -- -- -- -- -- -- -- -- -- --
50: -- -- -- -- -- -- -- -- -- -- -- -- -- -- -- --
60: -- -- -- -- -- -- -- -- -- -- -- -- -- -- -- --
70: -- -- -- -- -- -- -- --
Using kernel driver#
To use the kernel driver to drive the SSD1306 oled, we have created an overlay /boot/firmware/overlays/k3-am67a-beagley-ai-i2c1-ssd1306.dtbo.
To load the overlay you have to add fdtoverlays /overlays/k3-am67a-beagley-ai-i2c1-ssd1306.dtbo to /boot/firmware/extlinux/extlinux.conf as shown below.
Note
Current overlay is created for 128x64 OLED displays, you can update the overlay to use it for other resolution OLED displays.
...
...
...

label microSD (default)
kernel /Image
append console=ttyS2,115200n8 root=/dev/mmcblk1p3 ro rootfstype=ext4 resume=/dev/mmcblk1p2 rootwait net.ifnames=0 quiet
fdtdir /
fdt /ti/k3-am67a-beagley-ai.dtb
fdtoverlays /overlays/k3-am67a-beagley-ai-i2c1-ssd1306.dtbo
After rebooting the board you should see /dev/fb0 available.
debian@BeagleBone:~$ ls /dev | grep fb
fb0
To show random noise on the display you can use /dev/urandom and feed it to /dev/fb0,
cat /dev/urandom > /dev/fb0
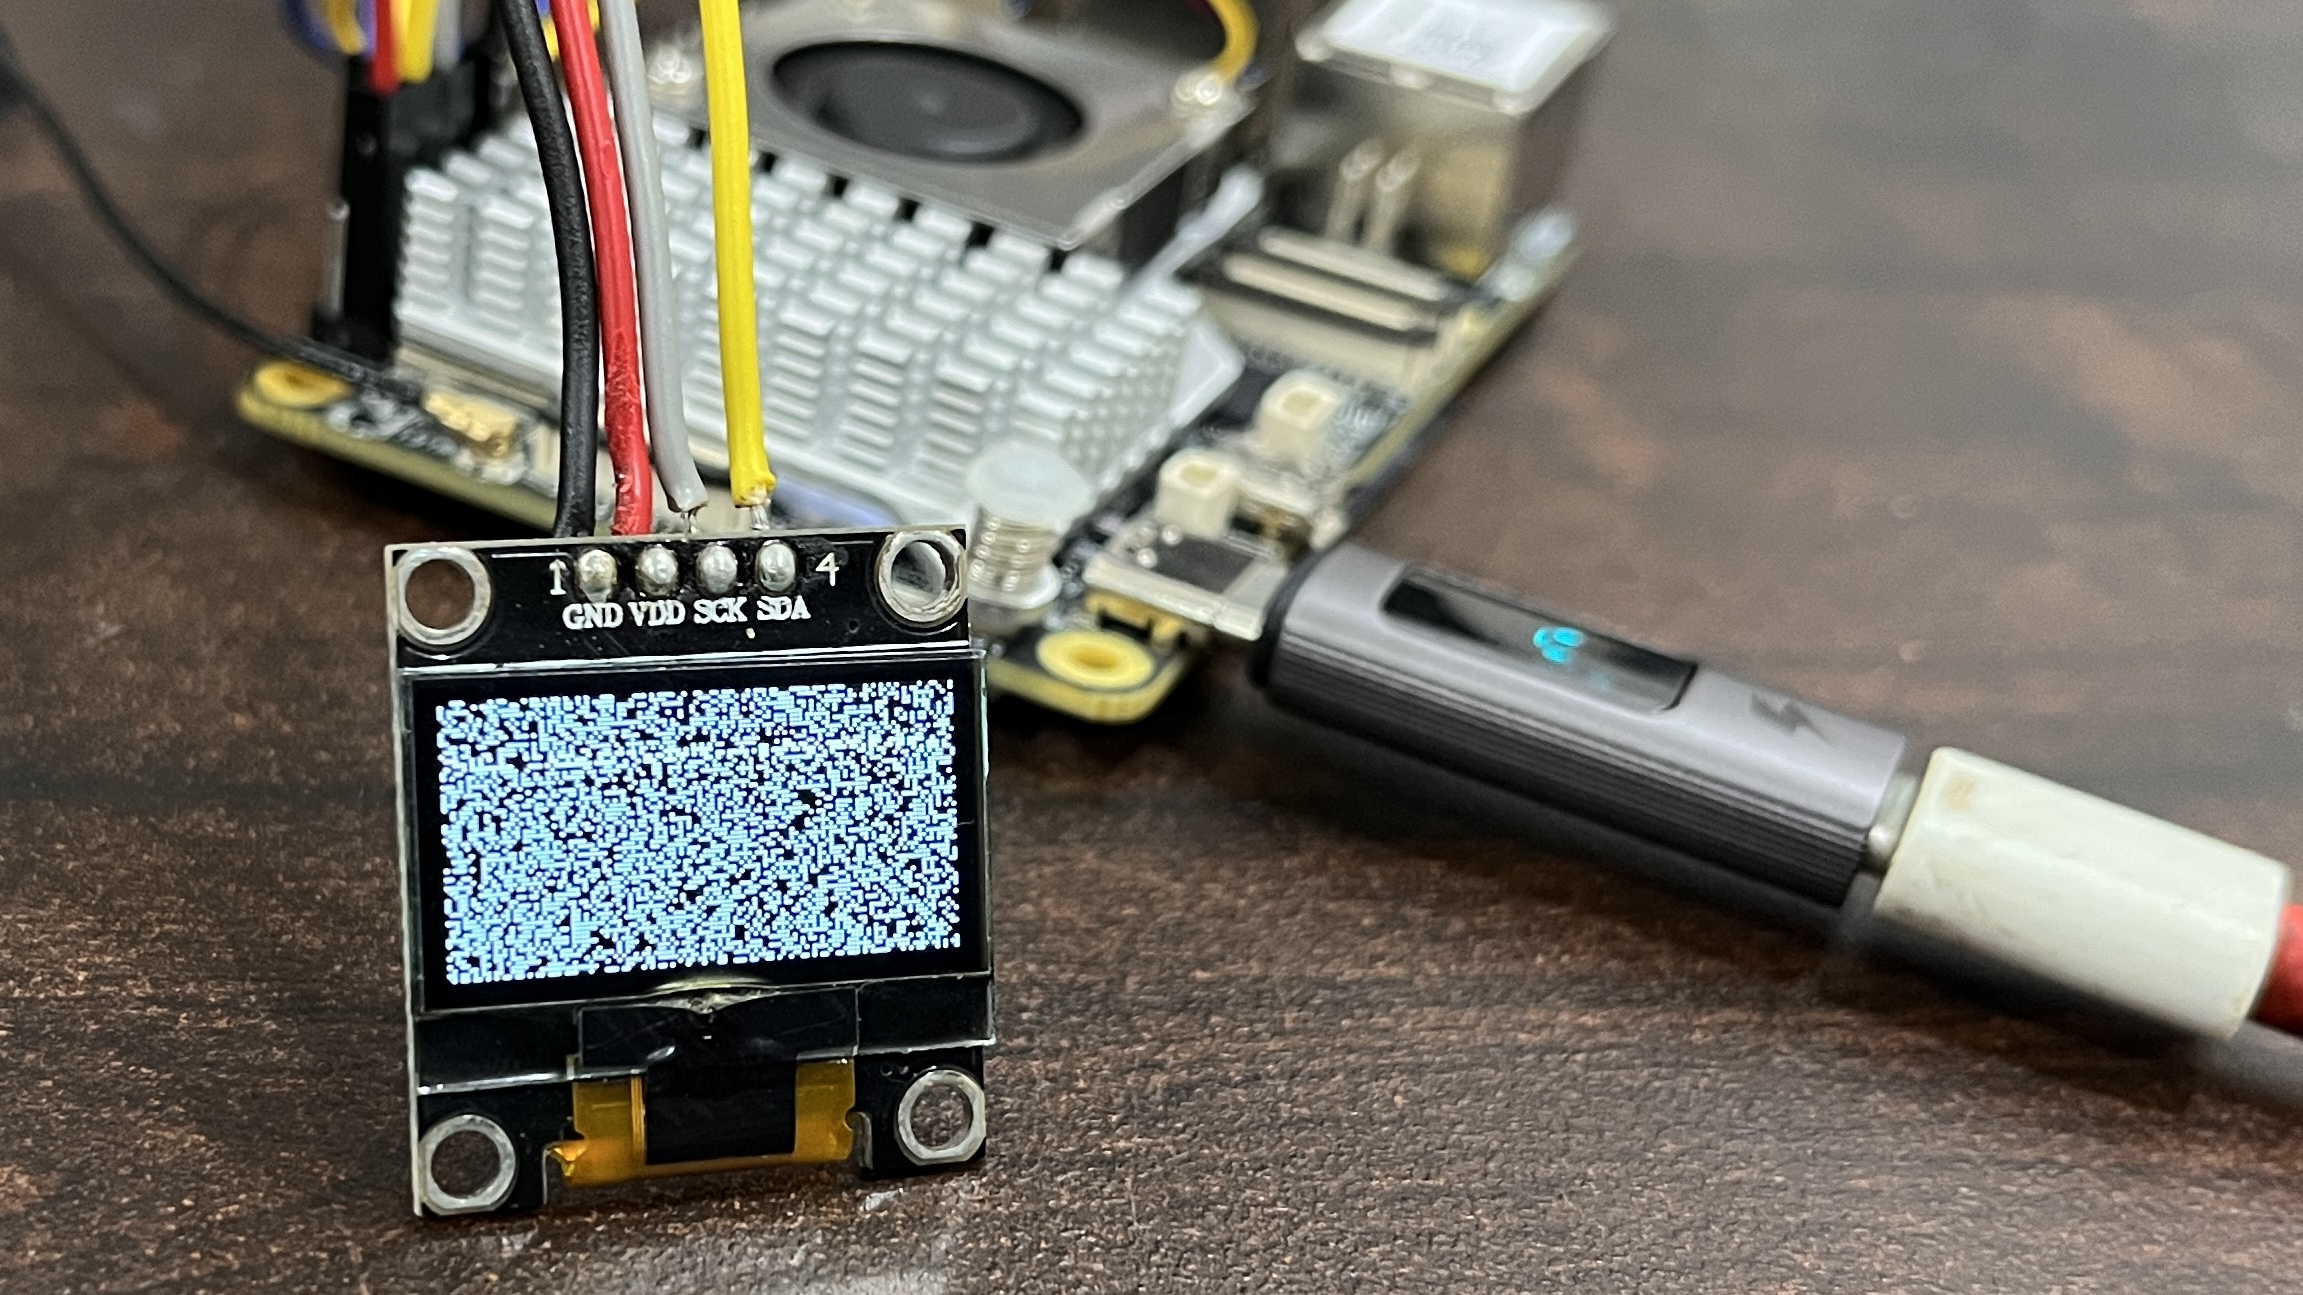
Fig. 128 Random noise on SSD1306 OLED#
To show blank screen you can use /dev/zero and feed it to /dev/fb0,
cat /dev/zero > /dev/fb0

Fig. 129 Blank (black/zero) SSD1306 OLED pixels#
To fill the screen with white pixels you can create a python script
called fill-oled.py to create data.out file and feed it to /dev/fb0,
nano fill-oled.py
Copy paste the below code to fill-oled.py,
xsize = 128
ysize = 64

with open('data.out', 'wb') as f:
for y in range(0, ysize):
    for x in range(0, xsize):
    pixel = 255
    f.write((pixel).to_bytes(1, byteorder='little'))
To get the data.out from fill-oled.py file execute the command below,
python fill-oled.py
The above command should create a file called data.out.
To feed data.out to /dev/fb0 execute the command below,
cat data.out > /dev/fb0
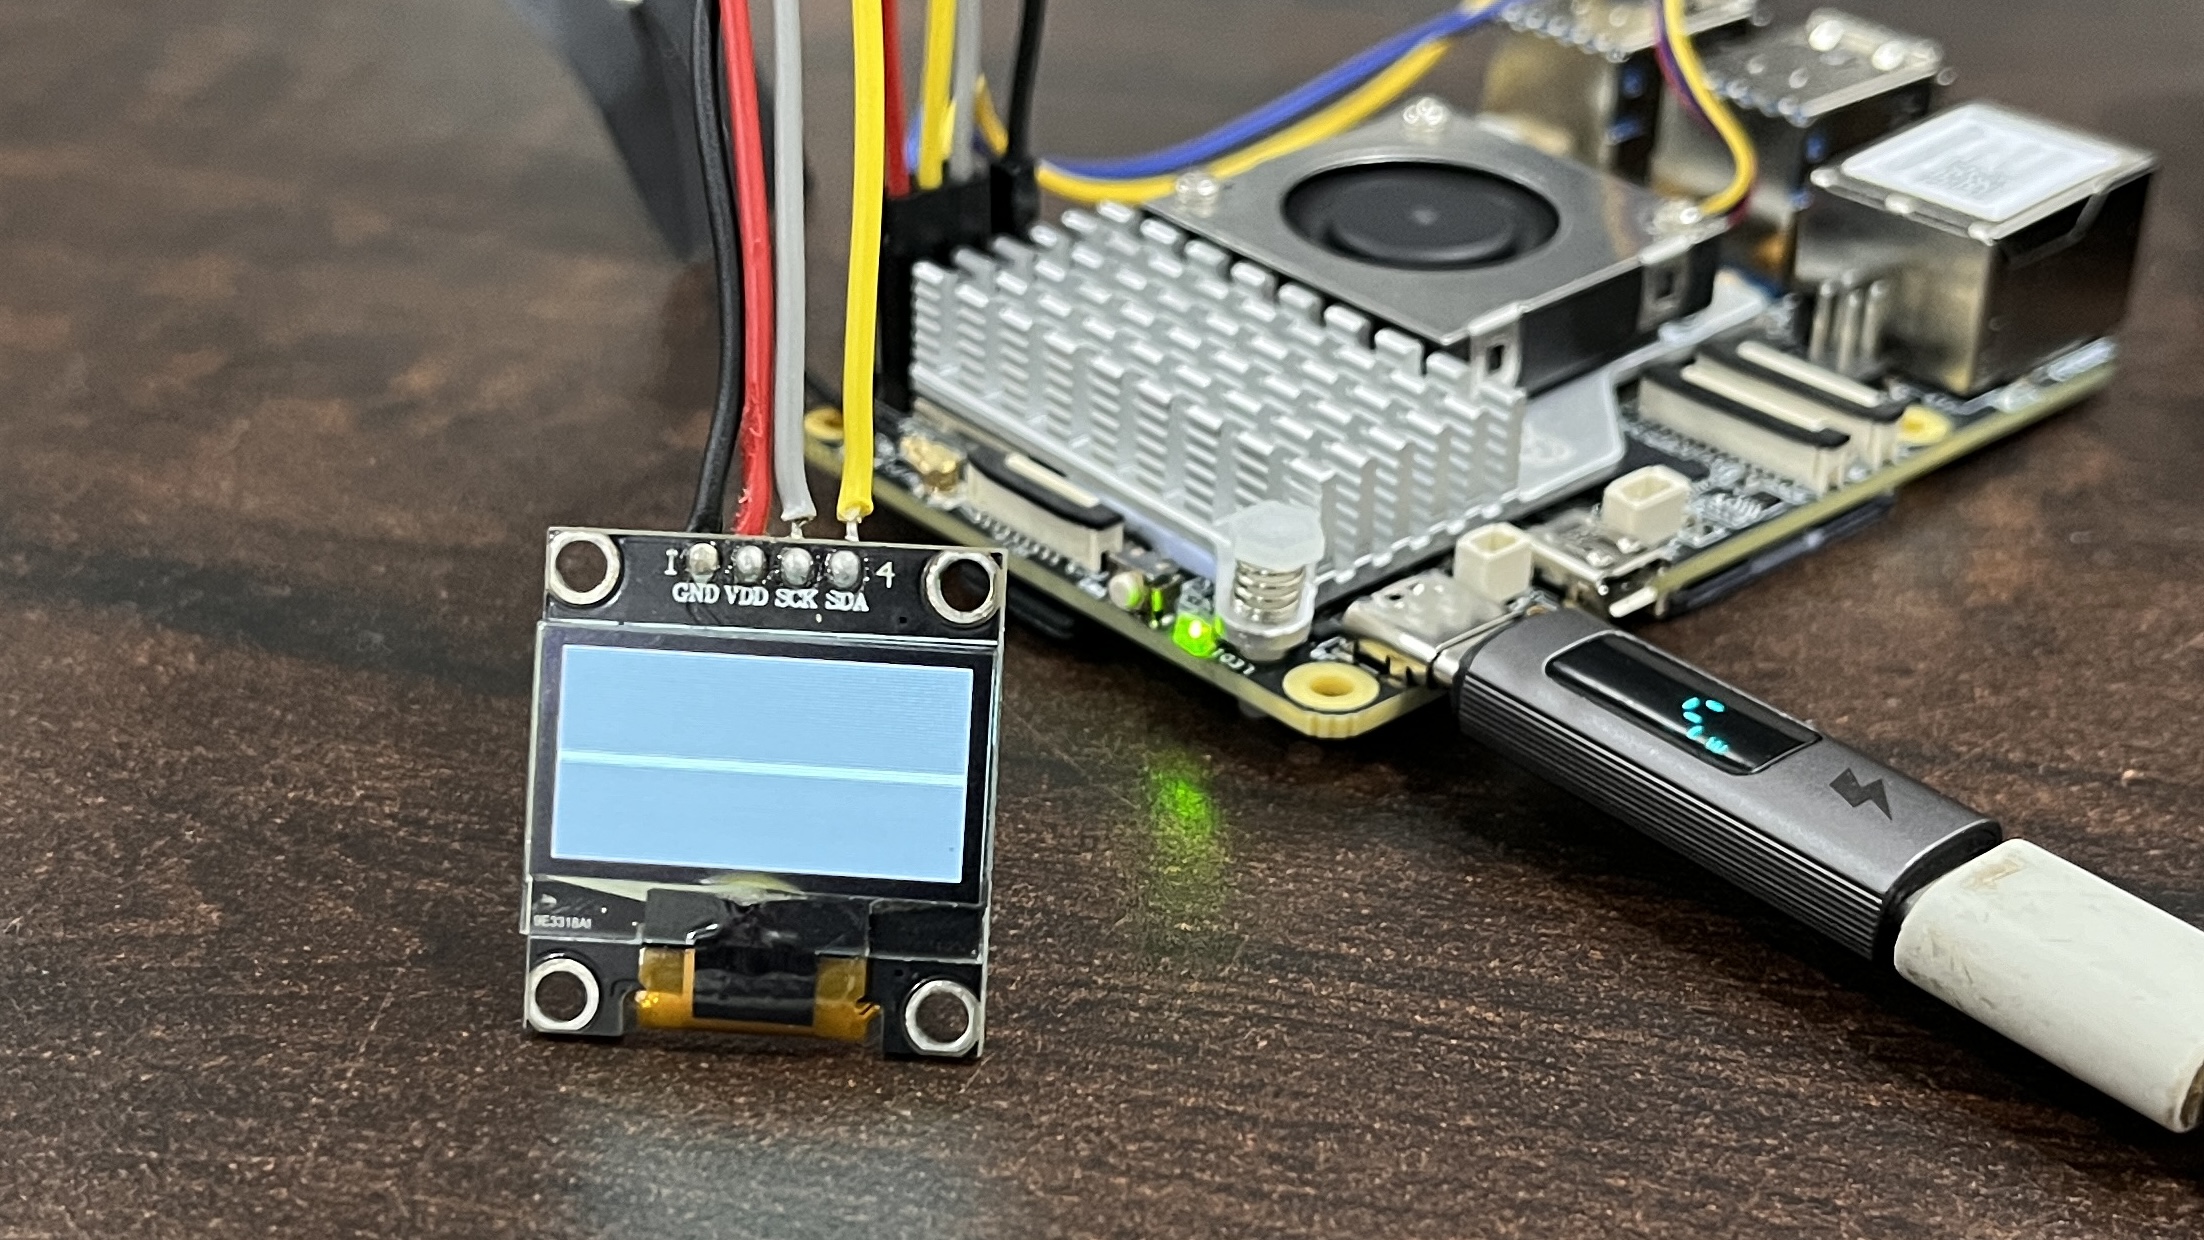
Fig. 130 Fill (white/ones) SSD1306 OLED pixels#
Todo
Add instructions to use OLED for console and printing text via /dev/fb0 interface.
Setup ssd1306 linux software#
There are several examples available online to use OLED (ssd1306) displays under linux.
We are using ssd1306_linux from armlabs to
demonstrate how you can write to an OLED (ssd1306) display.
Tip
For detailed usage examples of the library check Examples section of the Readme.
Note
If you tried Using kernel driver, you must remove the
fdtoverlays /overlays/k3-am67a-beagley-ai-i2c1-ssd1306.dtbo line from
/boot/firmware/extlinux/extlinux.conf and reboot your BeagleY-AI board
before following the instructions provided below.
Clone the ssd1306_linux github repository on your BeagleY-AI.
git clone https://github.com/armlabs/ssd1306_linux.git
Change directory to your clonned ssd1306_linux github repository.
cd ssd1306_linux
Execute make to build the binary to control your I2C OLED display.
make
Now, you should have ssd1306_bin binary file genreated in the folder that you can use to easily
write text on you I2C OLED (ssd1306) display.
Example1: Hello World!!!!#
let’s create a script inside the repository (ssd1306 folder) to print Hello World!!!! on the screen.
nano hello-world.sh
Now copy paste the code shown below in your hello-world.sh file. Update the code if your display resolution
is not 128x64, comment out first line and uncomment second line to choose 128x32 display size.
./ssd1306_bin -n 1 -I 128x64
#./ssd1306_bin -n 1 -I 128x32


./ssd1306_bin -n 1 -c
./ssd1306_bin -n 1 -r 0
./ssd1306_bin -n 1 -x 1 -y 1
./ssd1306_bin -n 1 -l "Hello World!!!!"
Execute the hello-world.sh script using command below,
source hello-world.sh
Executing the command above should print Hello World!!!! on your OLED display.
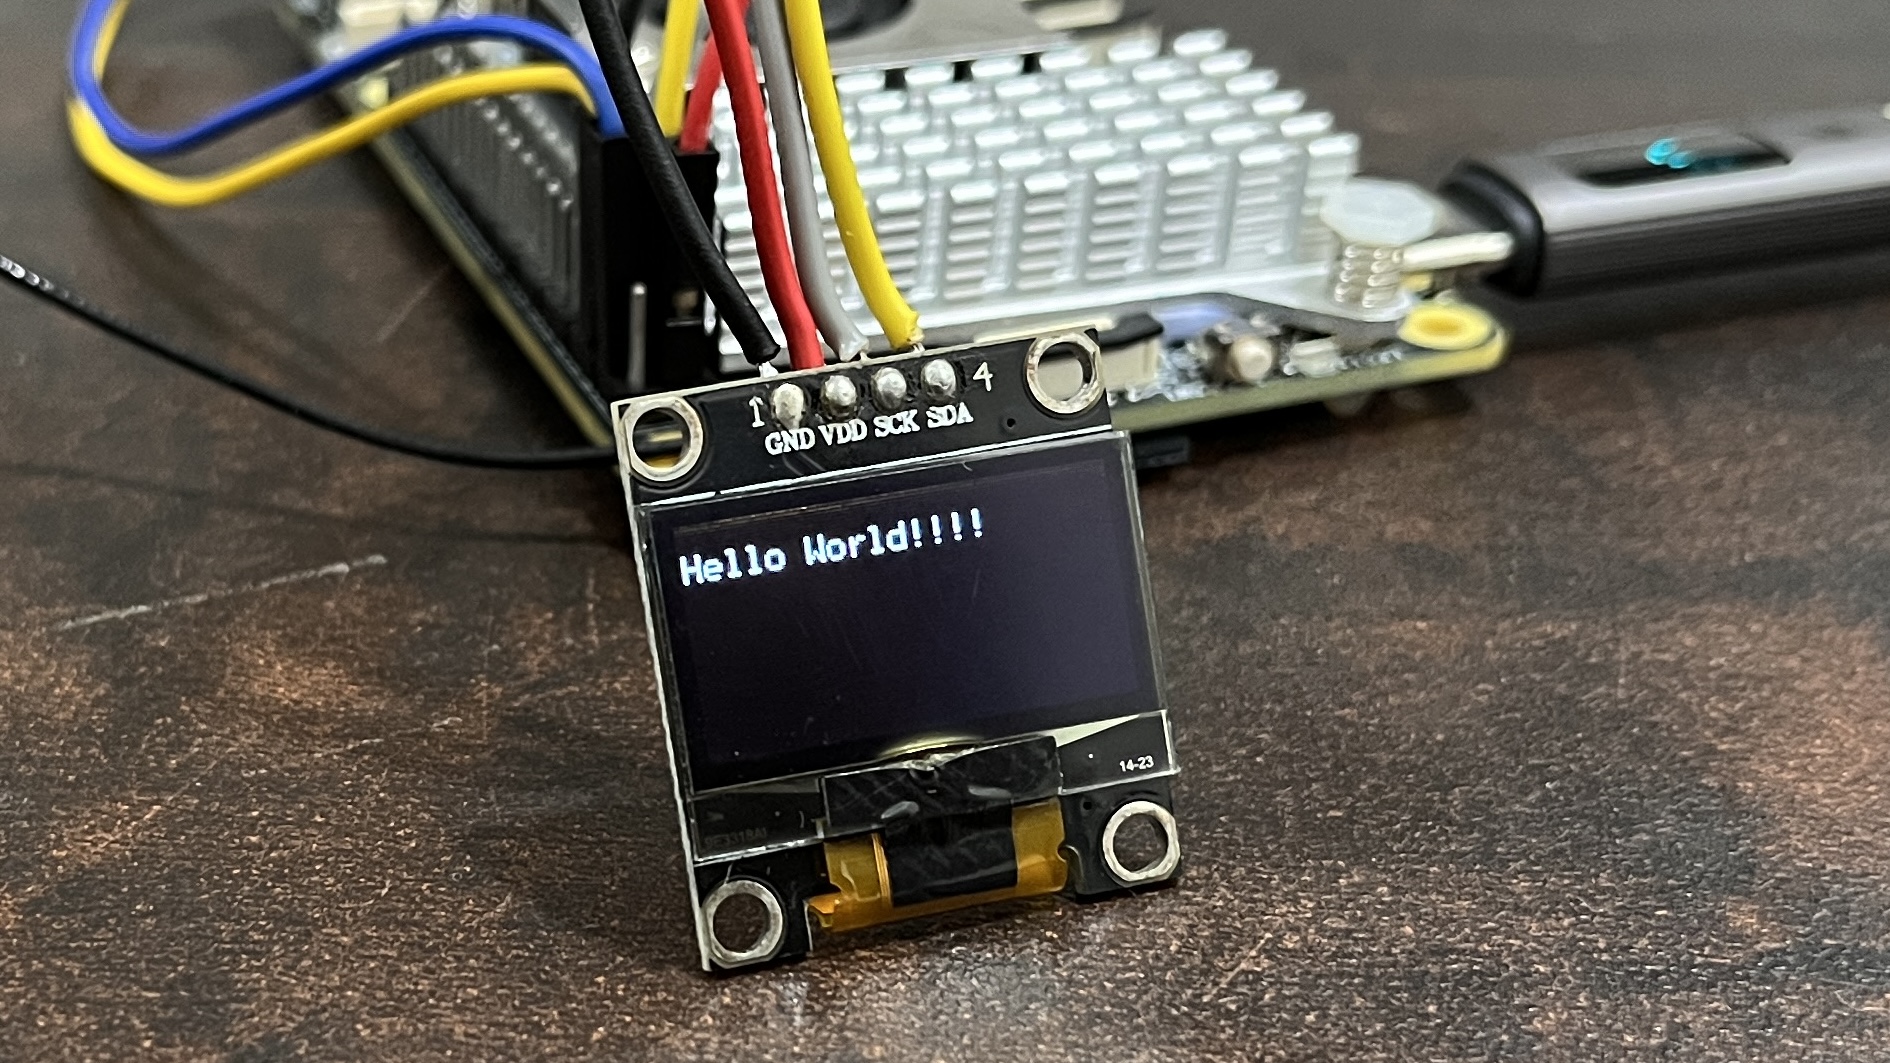
Fig. 131 Hello World!!!! on 128x64 OLED#
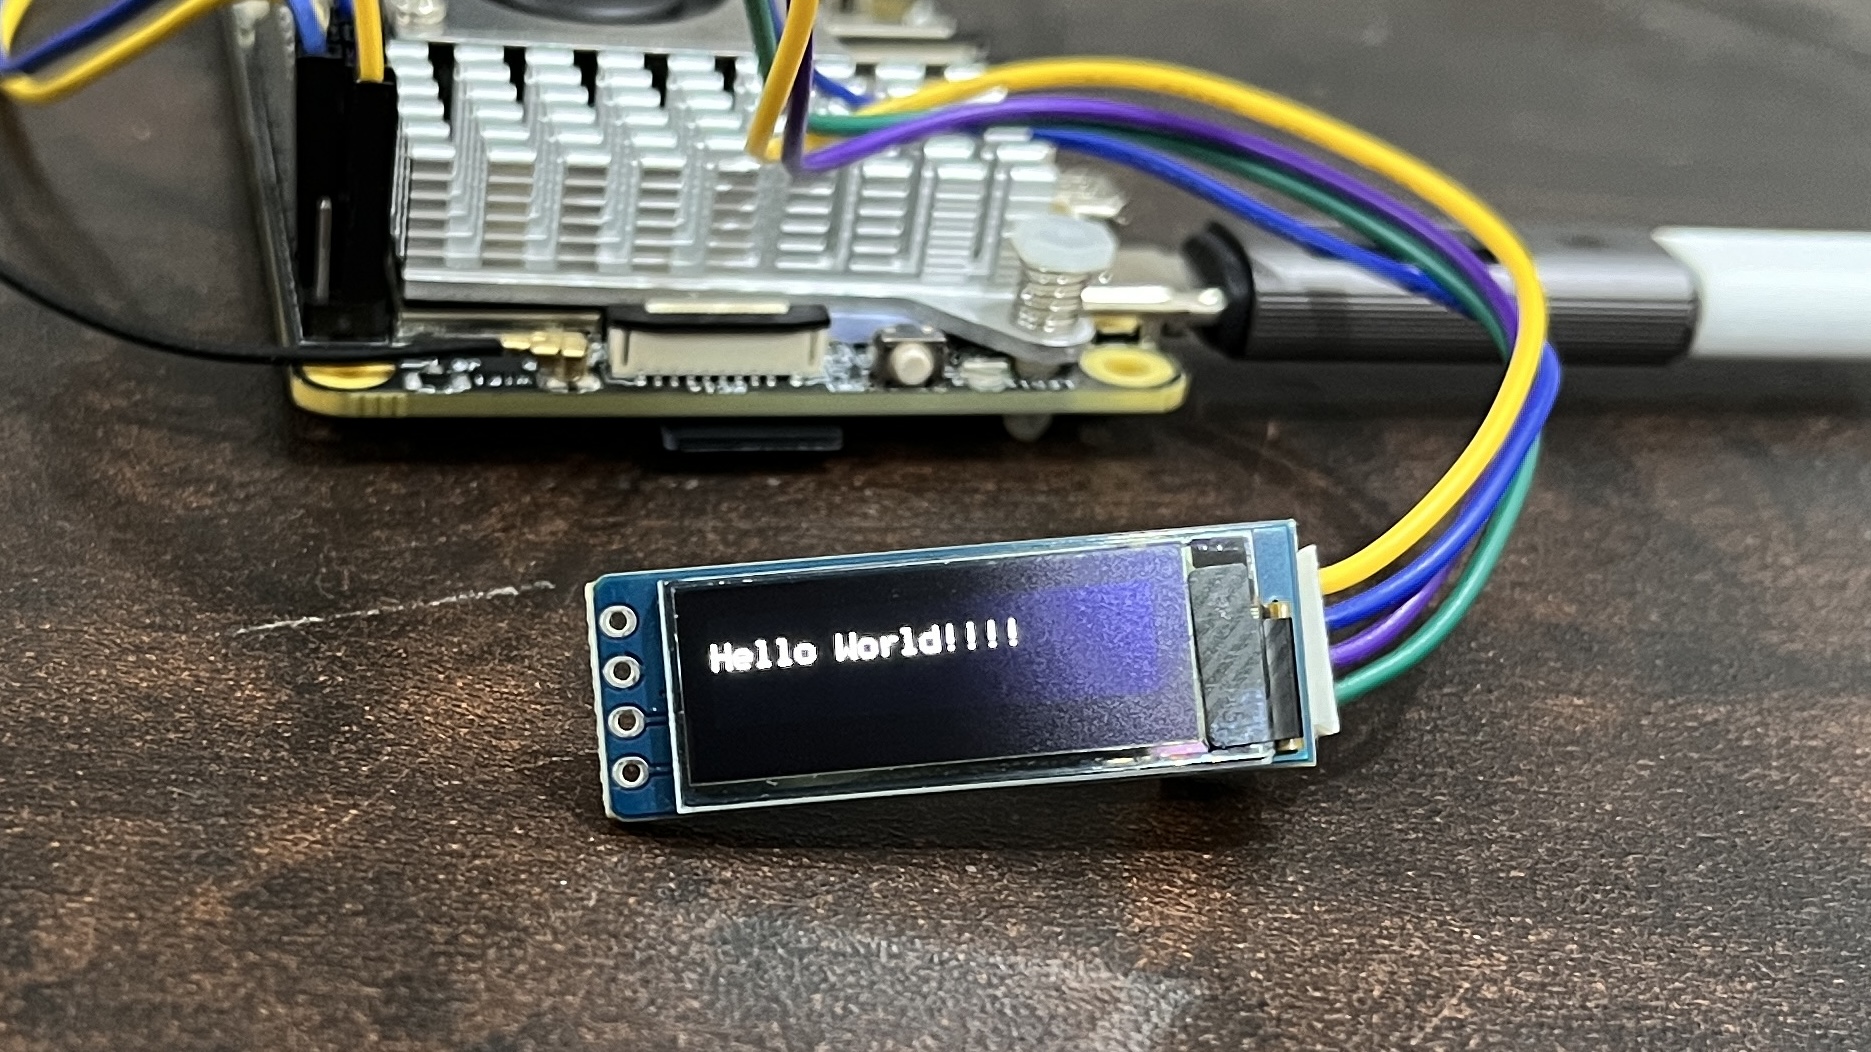
Fig. 132 Hello World!!!! on 128x32 OLED#
Understanding the code#
./ssd1306_bin -n 1 -I 128x64 ①
#./ssd1306_bin -n 1 -I 128x32 ②


./ssd1306_bin -n 1 -c ③
./ssd1306_bin -n 1 -r 0 ④
./ssd1306_bin -n 1 -x 1 -y 1 ⑤
./ssd1306_bin -n 1 -l "Hello World!!!!" ⑥
① Use this command to set OLED display resolution to 128x64
② Use this command to set OLED display resolution to 128x32
③ Clear the display
④ Set rotation to 0/normal
⑤ Set cursor to location x:1 y:1
⑥ Write Hello World!!!! to display as line using -l command.
Note: We are using -n 1 because our OLED display is connected to /dev/i2c-1 port.
Example2: Date and time#
To print the date and time on our OLED screen we will be using date command but you
can also use hwclock command to show date and time from onboard RTC. For details on using
date and hwclock you can check Using the on-board Real Time Clock (RTC) demo.
Let’s create date-time.sh in the same folder.
nano date-time.sh
Now copy paste the code shown below in your date-time.sh file. Make sure to update the code if your display resolution
is not 128x64, comment out first line and uncomment second line to choose 128x32 display size.
./ssd1306_bin -n 1  -I 128x64
#./ssd1306_bin -n 1 -I 128x32

./ssd1306_bin -n 1 -c
./ssd1306_bin -n 1 -r 0

while :
do
./ssd1306_bin -n 1 -x 1 -y 1
./ssd1306_bin -n 1 -f 1 -m "$(date +%Y:%m:%d)\n\n$(date +%H:%M:%S)"
done
Execute the date-time.sh script using command below,
source date-time.sh
Executing the command above should print Date & Time on your OLED display.
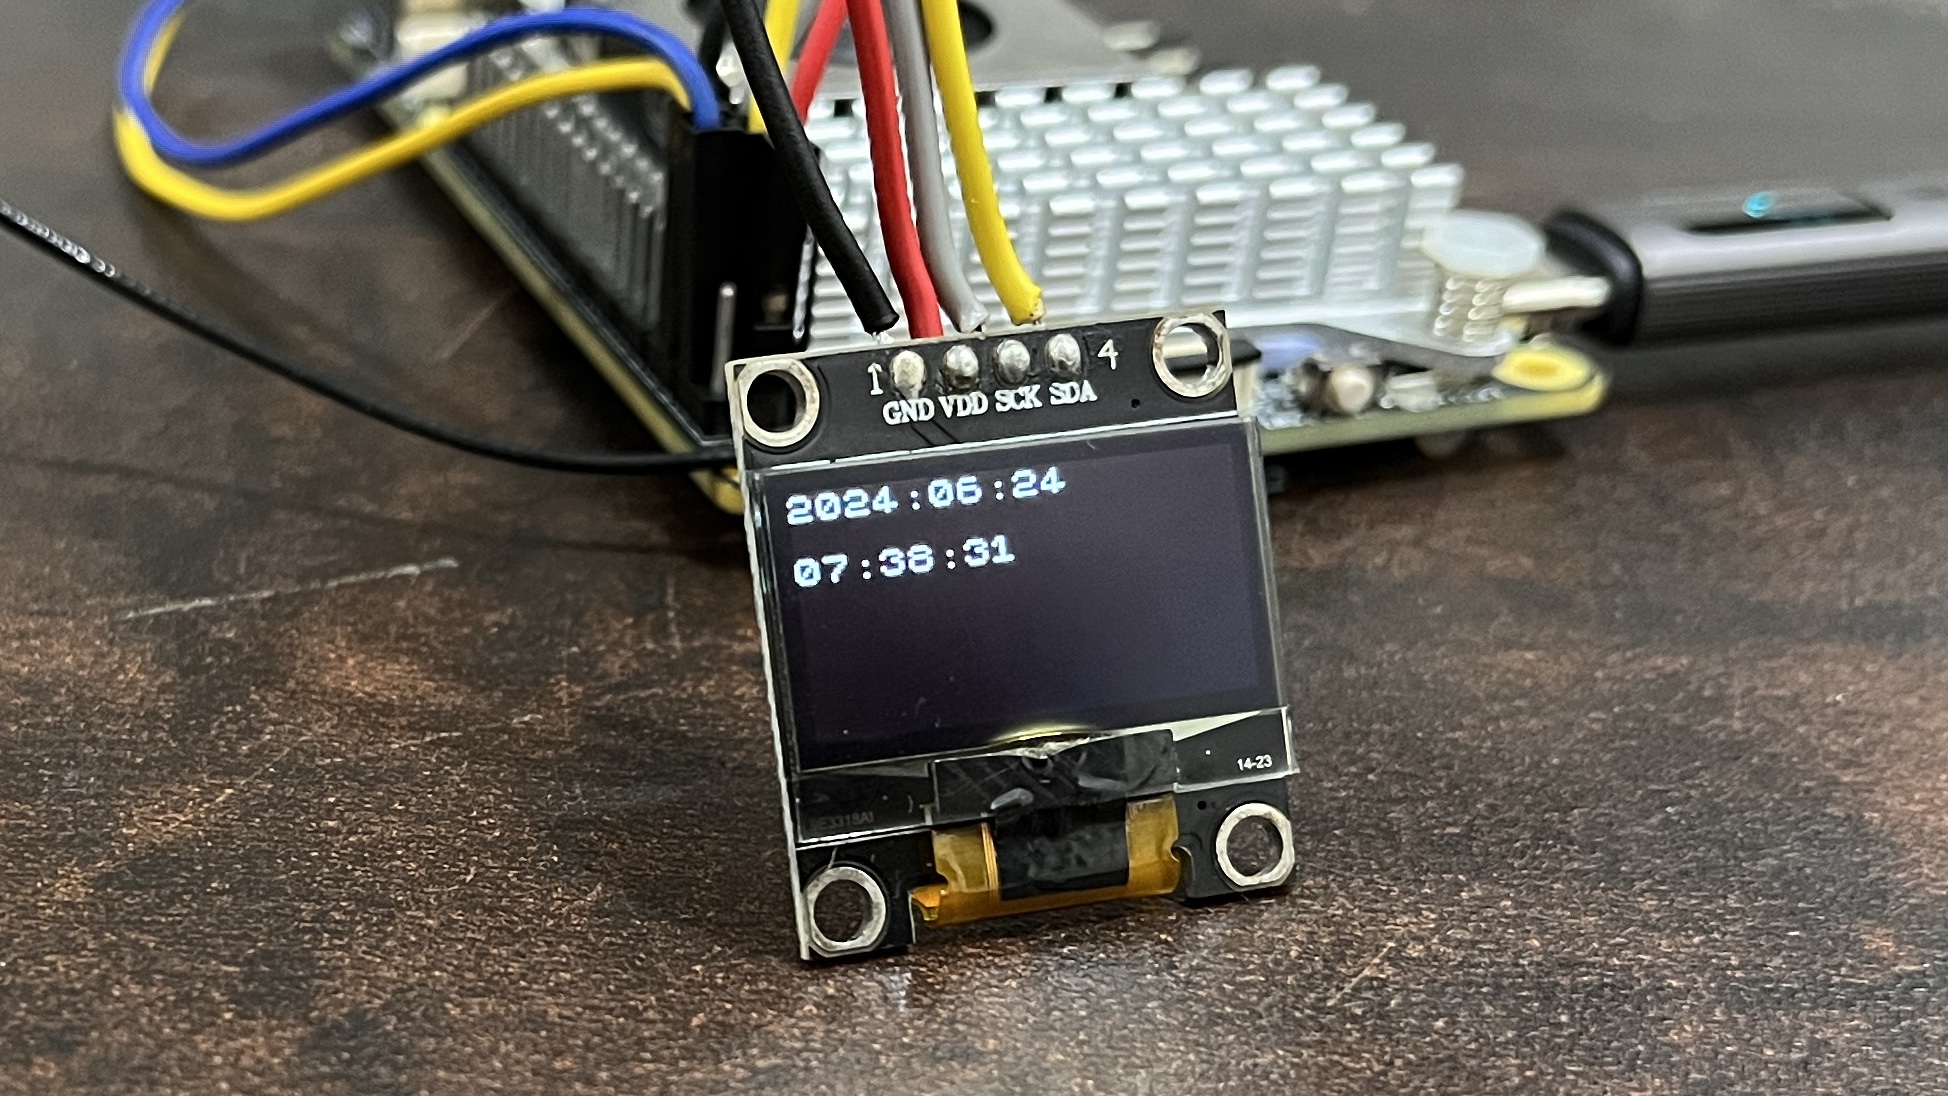
Fig. 133 Date & Time on 128x64 OLED#
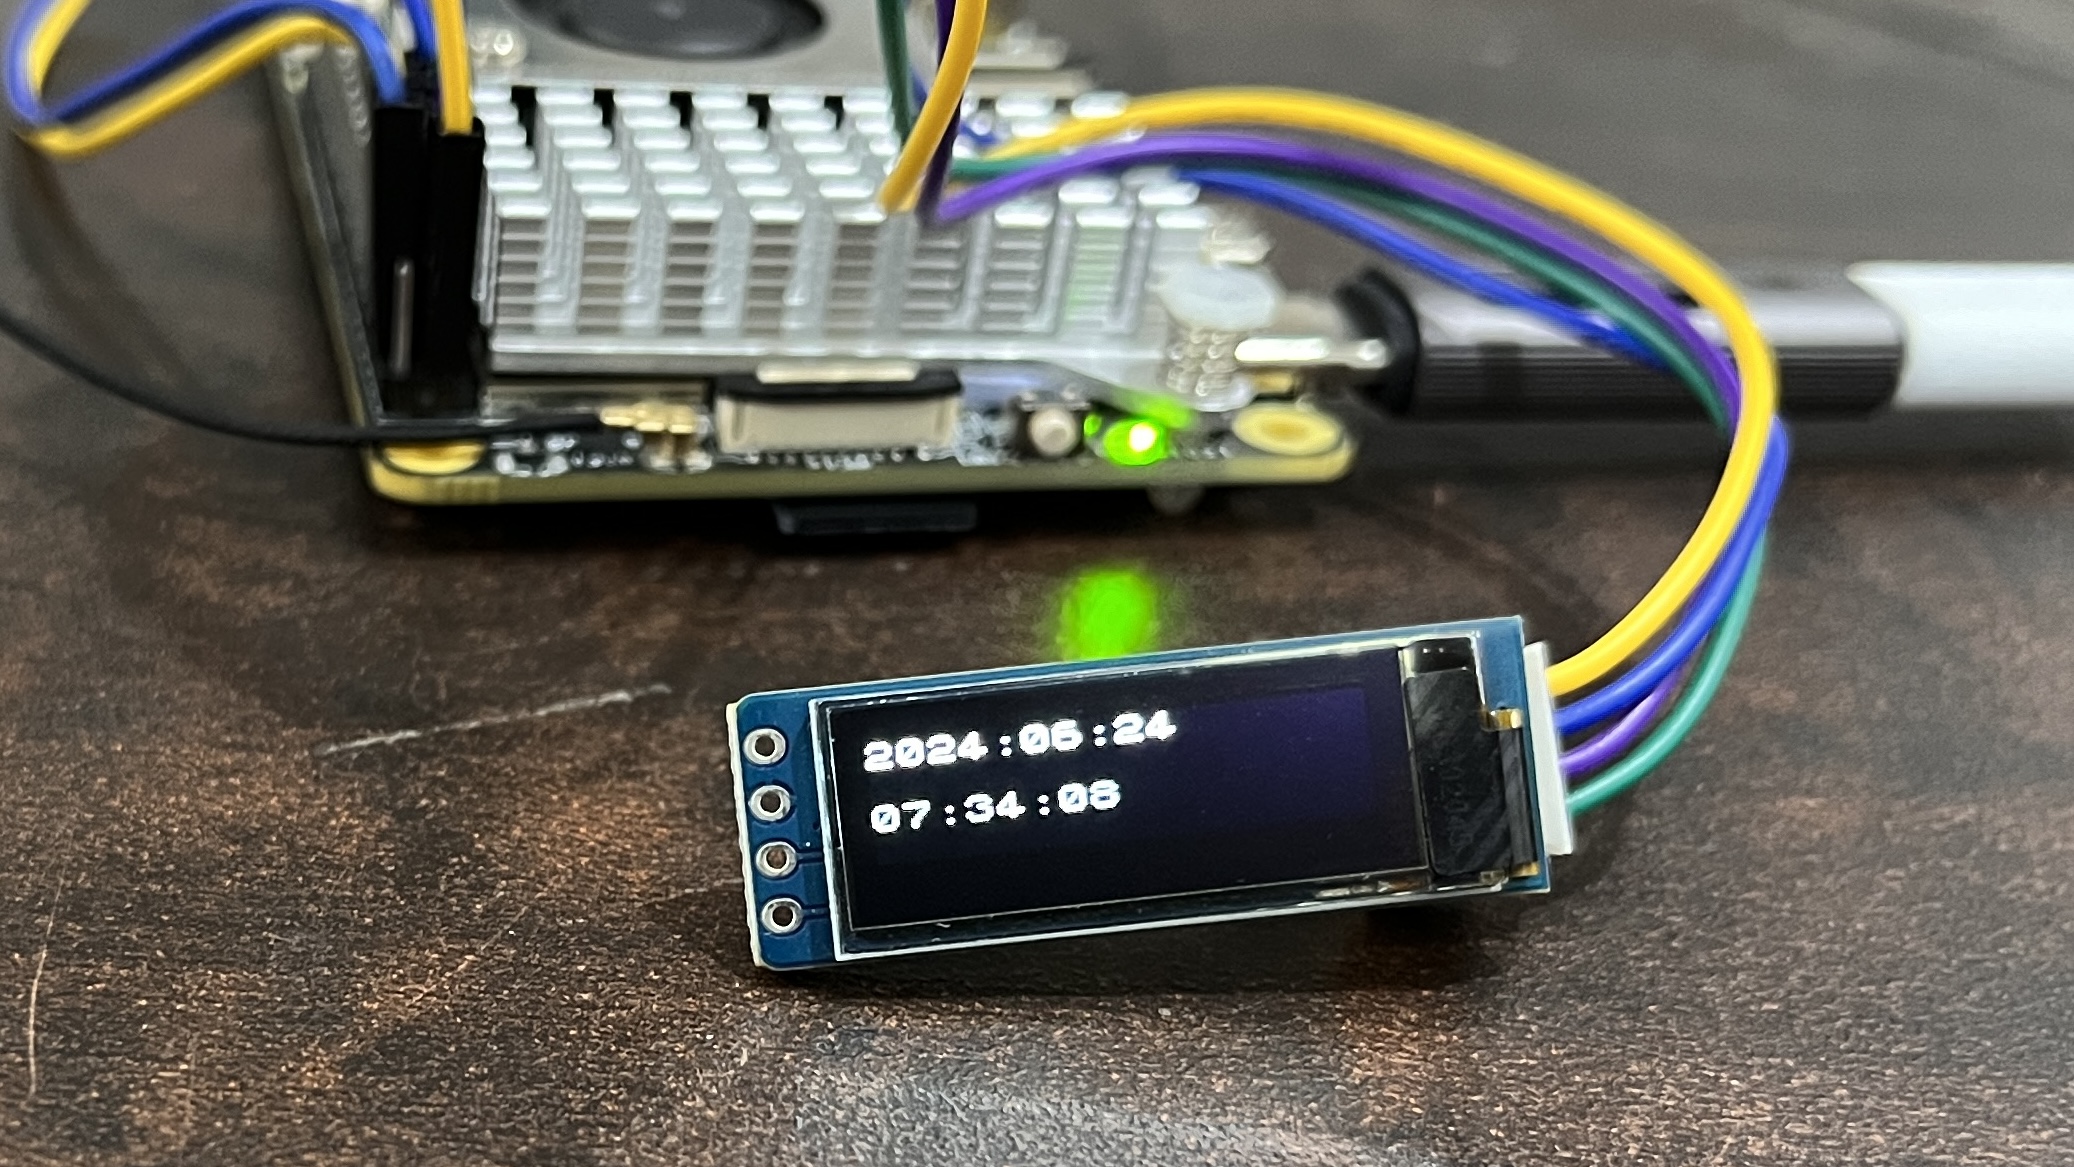
Fig. 134 Date & Time on 128x32 OLED#
Understanding the code#
./ssd1306_bin -n 1  -I 128x64 ①
#./ssd1306_bin -n 1 -I 128x32 ②

./ssd1306_bin -n 1 -c ③
./ssd1306_bin -n 1 -r 0 ④

while : ⑤
do
./ssd1306_bin -n 1 -x 1 -y 1 ⑥
./ssd1306_bin -n 1 -f 1 -m "$(date +%Y:%m:%d)\n\n$(date +%H:%M:%S)" ⑦
sleep 0.2 ⑧
done
① Use this command to set OLED display resolution to 128x64
② Use this command to set OLED display resolution to 128x32
③ Clear the display
④ Set rotation to 0/normal
⑤ Run infinite loop to regularly update screen.
⑥ Set cursor to location x:1 y:1
⑦ Write Date and Time to display on separate lines as message using -m command.
⑧ Sleep for 200ms (200 milli seconds)
Note: We are using -n 1 because our OLED display is connected to /dev/i2c-1 port.
Tip
Other I2C devices can also be connected and used with BeagleY-AI in the same way shown in this demo.
